This guide will offer a step-by-step walkthrough on activating and deactivating plugins directly from your WP-Stack dashboard.
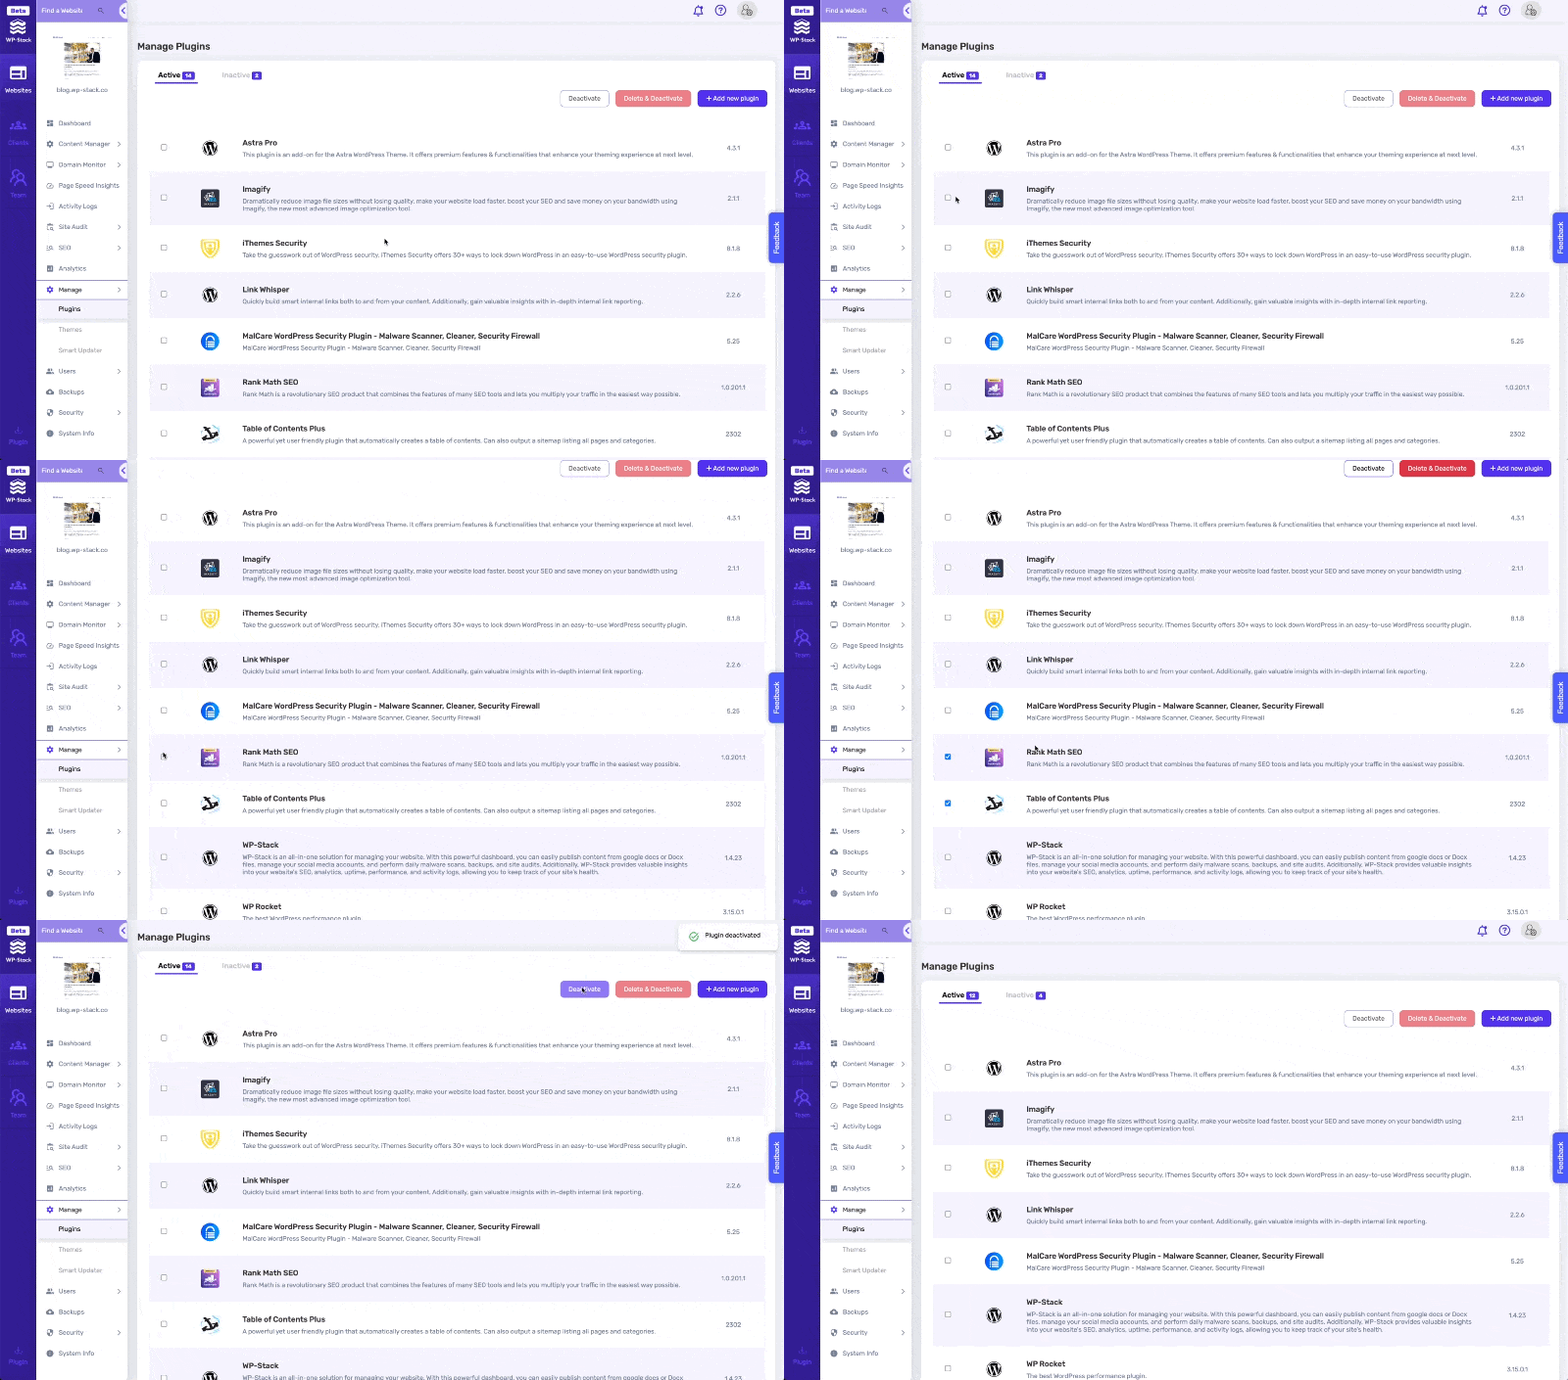
Deactivating unused or unnecessary plugins can help improve the speed and security of your website. Follow the steps below to deactivate plugins:

Navigate to the Manage Menu: Start by logging into your WP-Stack dashboard. On the left-hand side, you'll see a menu - click on 'Manage.' This opens up a range of options related to the management of your website.
Access Active Plugins: In the 'Manage' menu, select 'Plugins' and click the 'Active' tab. Here, you will find a list of all the active plugins installed on your website.
Select Plugins to Deactivate: Identify the plugin or plugins you wish to deactivate. Click on the checkbox next to each plugin's name to select it.
Pro Tip: You can select multiple plugins if you wish to perform a bulk deactivation. This is particularly useful when you're looking to improve site speed or troubleshoot potential plugin conflicts.
Deactivate Selected Plugins: Click the 'Deactivate' button once you've selected. The selected plugins will be deactivated and moved to the 'Inactive' tab.
Activating plugins allows you to add new features and functionalities to your website. To activate plugins, follow these steps:

Navigate to the Manage Menu: Log into your WP-Stack dashboard and click on 'Manage' in the menu to the left.
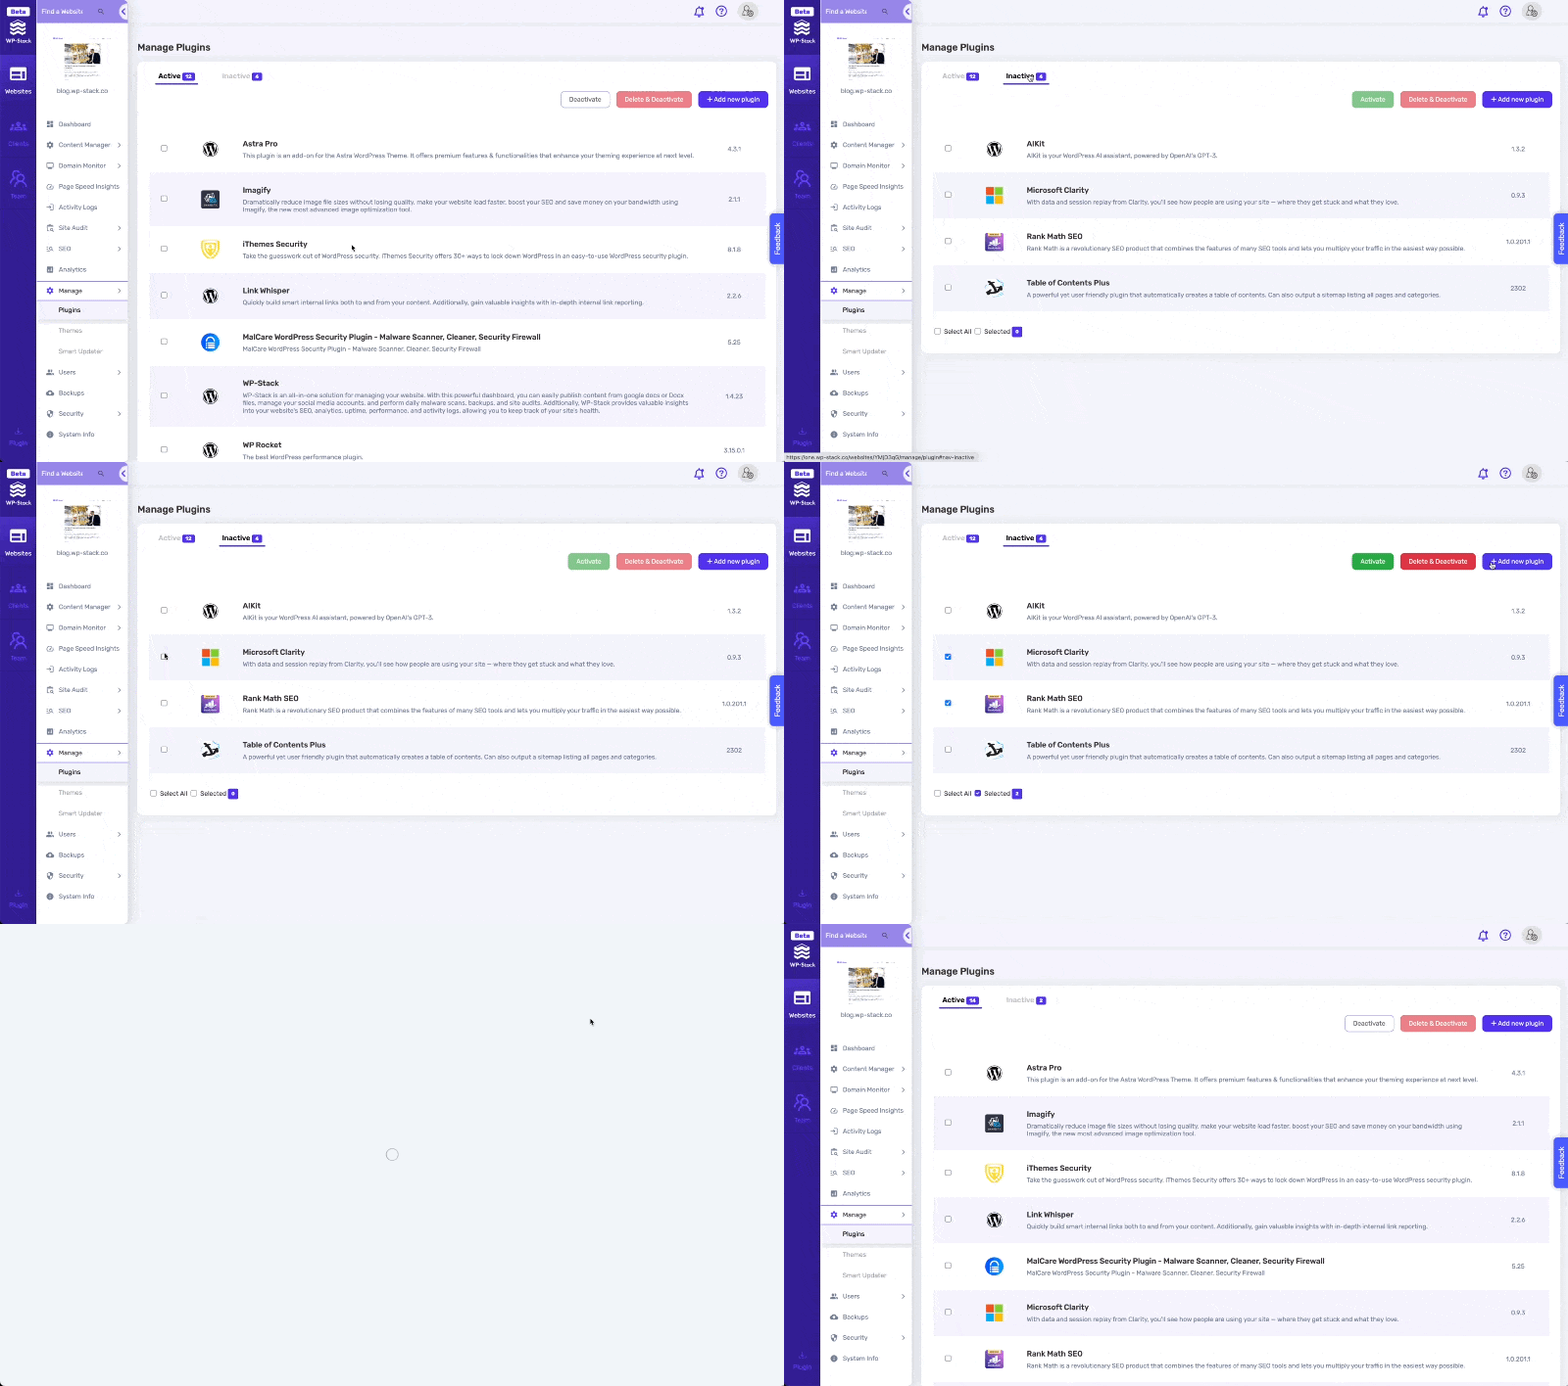
Access Inactive Plugins: Click 'Plugins' and then navigate to the 'Inactive' tab. Here, you'll see a list of all inactivated plugins.
Select Plugins to Activate: Look through the list and select the plugin or plugins you wish to activate by clicking on the checkbox next to each plugin's name.
Pro Tip: You can select multiple plugins for a bulk activation. This feature is especially useful when setting up a new site or implementing widespread changes to your site's functionality.
Activate Selected Plugins: After selecting, click the 'Activate' button. The selected plugins will be activated and moved to the 'Active' tab.
If you need further assistance or have any queries, please don't hesitate to contact our support team.