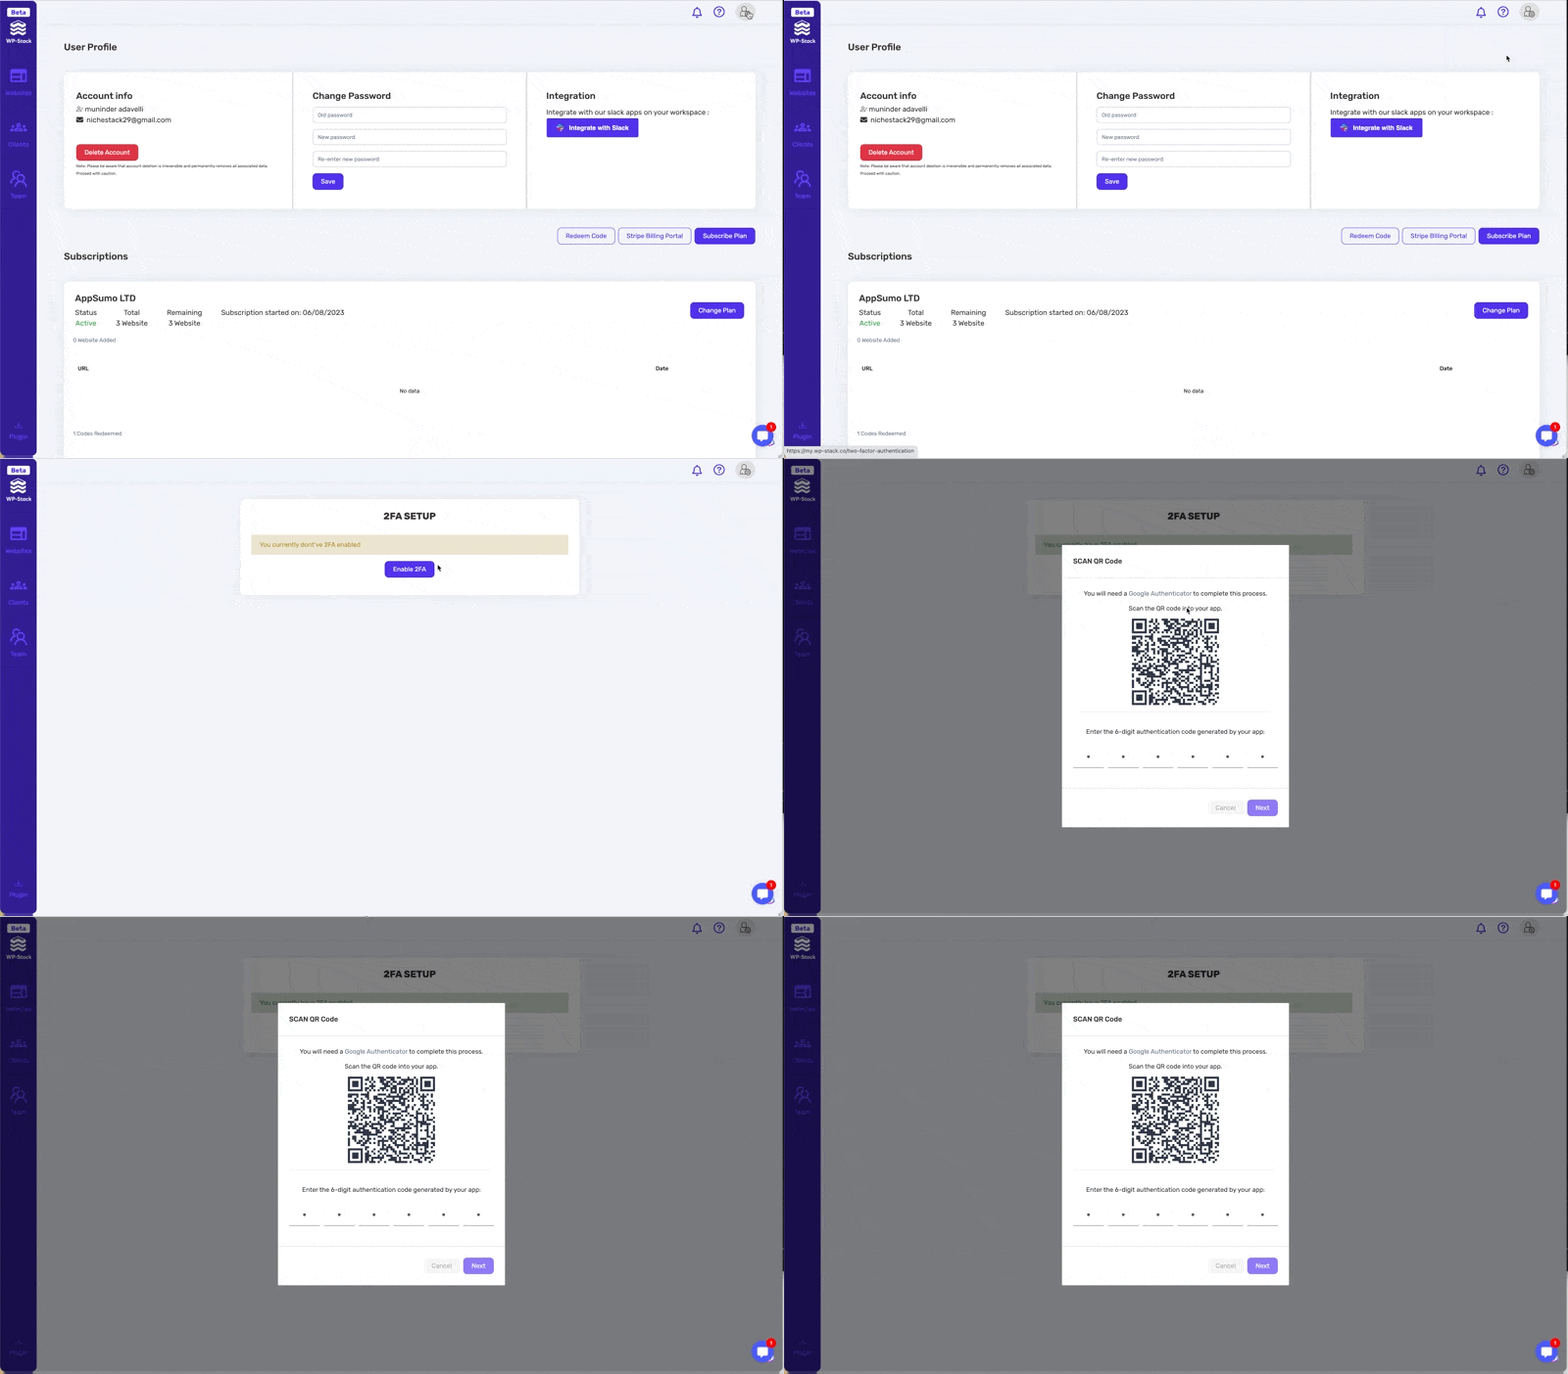
The following guide will assist you in enabling two-factor authentication (2FA) on WP-Stack. This is an important security measure that helps protect your account from unauthorized access.
Access the Profile Icon: On the top right corner of your WP-Stack account dashboard, click on the profile icon.
Select Two-Factor Authentication: From the dropdown menu that appears, select "Two-Factor Authentication".
Enable 2FA: You'll be prompted to input your password for verification purposes. After entering your password, click on "Enable 2FA".

Scan QR Code: A popup window with a QR code will appear. Using your authenticator app (such as Google Authenticator or Authy), scan this QR code.
Enter Verification Code: Your authenticator app will generate a unique 6-digit code. Enter this code into the field provided on WP-Stack to verify the connection between WP-Stack and your authenticator app. Hit "Next".
Save Recovery Codes: Once the verification is successful, WP-Stack will provide you with recovery codes. These codes can be used to access your account if you ever lose your authenticator device. It's crucial to keep these codes safe. You have the option to "Download", "Email", or "Copy and Paste" these codes for secure storage.
Confirm Setup: After you have safely saved your recovery codes, click on "Done" to complete the setup.
Remember, enabling 2FA significantly increases the security of your WP-Stack account. We highly recommend all users to enable this feature.
For any further assistance, don't hesitate to reach out to our support team.